Proudly Canadian

Proudly Canadian

Friday, January 31, 2014

Believe

Alright, just one more before bed... ;) 

I used Wendy Vecchi's reinker/alcohol marbling technique with Cornflower blue and Fern green.  I finished the edges with the complimenting ink and a blending tool.  Pulled out a variety of different stencils and stamps.  The small honeycomb stencil is Studio 490 stencil, I love the small size of this stencil.  It's a nice change from the larger sizes out there.  I continued the same ink colors for the stencilling and stamping. 

Of course, I had to use one of the embossing pastes I purchased and decided on the translucent paste. I really wanted to see what this looked like.  I love it!  It went on white and as it dried it became translucent and very glossy looking.  So cool!  :)  I used Tim's stripes stencil. 

The Eiffel tower die cut is from Tim's Alterations dies.  I cut them out on glossy paper and then colored the Eiffel tower using Wendy's same marbling technique using reinkers in coffee, orange blossom and gold mixative.   I found it a bit too orange so I heat set it and then used coffee ink and a blending tool and deepened the color.   The Fleur de leis was done the same way with reinker Fern green and gold mixative. 

The sentiment is a Dylusion saying and stamped onto the backer paper that I save from Tim's stencil packaging.  It was the perfect glossy brown color.  I stamped the sentiment on with Coffee ink and heat set.  I cut the words to separate. 

Glue all the pieces in place. 


As much as I could do this all night long, I should get myself ready for bed.  Tomorrow will be a house cleaning day since I opted to not do it today.  LOL  I was so excited today because I managed to snag myself a proper office chair for my craft room.  My bulky dining room chair can finally go back to the table where it belongs.  I found this beautiful chrome and leather chair with roller feet for $30.  So thrilled!  :)  It's perfect!  It's always so cool when we can find such a great deal for our craft rooms.  Whoohoo.... 

Housework... Nahhhh....

Who wants to do housework when there is so much fun stuff laying around to play with?  My new motto is Perfection doesn't live here anymore, Joy does.  :)   And so, since a few of my plans didn't pan out as anticipated today I used that time to get creative. 

I mentioned in my last post that I was going to try my pigment inks from CTMH with the alcohol and see if I could get a nice vibrant effect like Wendy Vecchi does with her archival inks.  The answer was no.  :(  The CTMH pigment inks do not mix with alcohol and all it did was make a sticky mess on my craft sheet.  So that plan went right out the window.  Oh well...

Back to Wendy's inks.  I finally got the cornflower blue ink pad.  Yehhhh... now just waiting on some of the missing reinkers I need still and of course the new colors this year.  So can not wait to add to the color combo's.  :) 

My first tag I did using Tim Holtz distress reinkers, but I used a tag that I had previously gesso'd, and this gave the inks a really nice pastel look to them.  :)  I then used Archival inks and distress inks for the stencilling and the sentiment.  I cut out some greenery from the Sizzlets Alterations dies and made some adorable little flower bunches using my mini prima flowers that I've had in my stash for years. 


My next tag was done with Wendy Vecchi archival reinkers and ink pads.  I used some distress inks for some softer stencilling and added some water droplets to react with the distress inks.  I also used some more of my mini flowers.  I found a package of cute white roses but it was a little too white and so I misted it with a Perfect Pearls mist in Blue Patina.  I love the shimmery look it gave the flower.  The mini flowers I used TH antiqued mini brads for the centers.  The dress form is a TH Movers and Shapers die and I cut it out on glossy paper and then alcohol inked it with some gold mixative, caramel, orange, and light aqua. I then used a very small script stamp from Kaiser to stamp with archival black over top of the dress form.  The sentiment is from Dylusions.  I finished off the dress form with some baker's twine. 


My last tag I wanted to try my stash of Wendy Vecchi embossing pastes.  My craft store got in all the pastes.  So I stocked up with the gold, silver, translucent, and white.  I already had the black.  I decided to try the gold embossing paste.  :) 

I marbled my background with the reinkers and alcohol first.  Then I took the stone wall stencil and used the gold paste.  It was very shimmery.  So I then took some mini sponge daubers and used the archival inks and muddled the colors over the gold.  It toned down the gold but when the light hits it, it still has that gold shimmery goodness.  I set the ink with the heat tool and then used the potting soil ink and a blending tool and blended the color in between the stones to intensify the background.  I cut out the TH globe using his backer paper that comes in the TH stencil packages.  I like the brown glossy look of the paper.  I used Viva Gold creams in gold/brown, gold and hematite to create the antiqued metallic look of the globe and the water on the globe.  (I realized after the fact that geographically I missed the mark.  The blue and brown areas should be swapped... too late!  Oops.)  Still looks cool.  ;) I inked around the edges with archival black for some depth using a small dauber sponge.  I found some of Tim Holtz rubons... airplane, the finger point and the word observations.  And I also used some of his word sentiments.  I picked out the words to say Discover your Imperfection so that I could use this tag as part of my art journaling that I am doing for my Brene' Brown course.  I think it turned out really well. 


I hope you enjoy.  I premade a pile of background tags using the alcohol marbling technique from Wendy Vecchi.  They are ready to grab my attention and make something with them.  :) 

Love hearing from you so please leave me a note so I know you were here.  :)  Have a super weekend!!!  Luvs and hugs...

Saturday, January 25, 2014

In my happy place...

Well this has been a really productive day!  I got my blog from yesterday done this morning and posted, finally took down my Xmas tree...(don't judge me...) LOL, did some laundry and cleaned the floors from all the glitter, and then even managed to do a couple more tags to show.  :) 

The techniques are basically the same as the other Wendy Vecchi reinker and alcohol marbling I did yesterday.  Used some different background stamps from Kaiser and Prima.  A TH diecut and stamps as well as a few distress inks for a softer effect overtop of some of the archivals and for distressing the edges.  :)  Been a blast.  

This one I used Tim's technique from CC102 by softening the stamped image with a dry clean sponge.  The image appears to just softly fade into the rest of the tag.  I love that look.  I also used some distress inks around the edges to bring some depth to the tag. 


This tag I marbled the wings as well but then I wanted them to stand out so I used two metallic creams from Viva Gold, in old gold and gold/brown to bring some dimension and depth to the wings.  The dress form was stamped with Archival black onto glossy paper and cut out, then distress inked in vintage photo and rusty hinge to color in the background. 
 
 
I can't wait to get the rest of the colors from Wendy Vecchi, plus the new ones coming out so I have more color choices to work with.  :)  I have all of the archival colors from CTMH so I'm going to experiment with some of them using the same techniques and see what comes of those colors and if they give the same great results.  They have some really great vibrant colors and some really nice pastel colors.  Can't wait to play with those and see what happens. :)  Stay tuned.  

Well, this has been fun!  I hope you enjoy your visits here and I'll be back with more soon.  Have a great night.  :)

Side tracked...

I'm back.... :)  Oh my, where do the days go?  I have just started getting back to work a couple of weeks ago and with that and other things on the go I haven't had nearly the time to get into my craft space and do my thing.  So needless to say, I've been working on my personal chipboard album on an inner growth journey and wanting to use my Brene' Brown course as an inspiration for my album pages.  However, with that being said, my time crafting has been doing my art journal pages which is part of the course with my SIL and I haven't taken that inspiration over to my chipboard album yet.  COMING SOON, to a blog near you... LOL  Sorry, couldn't help myself. 

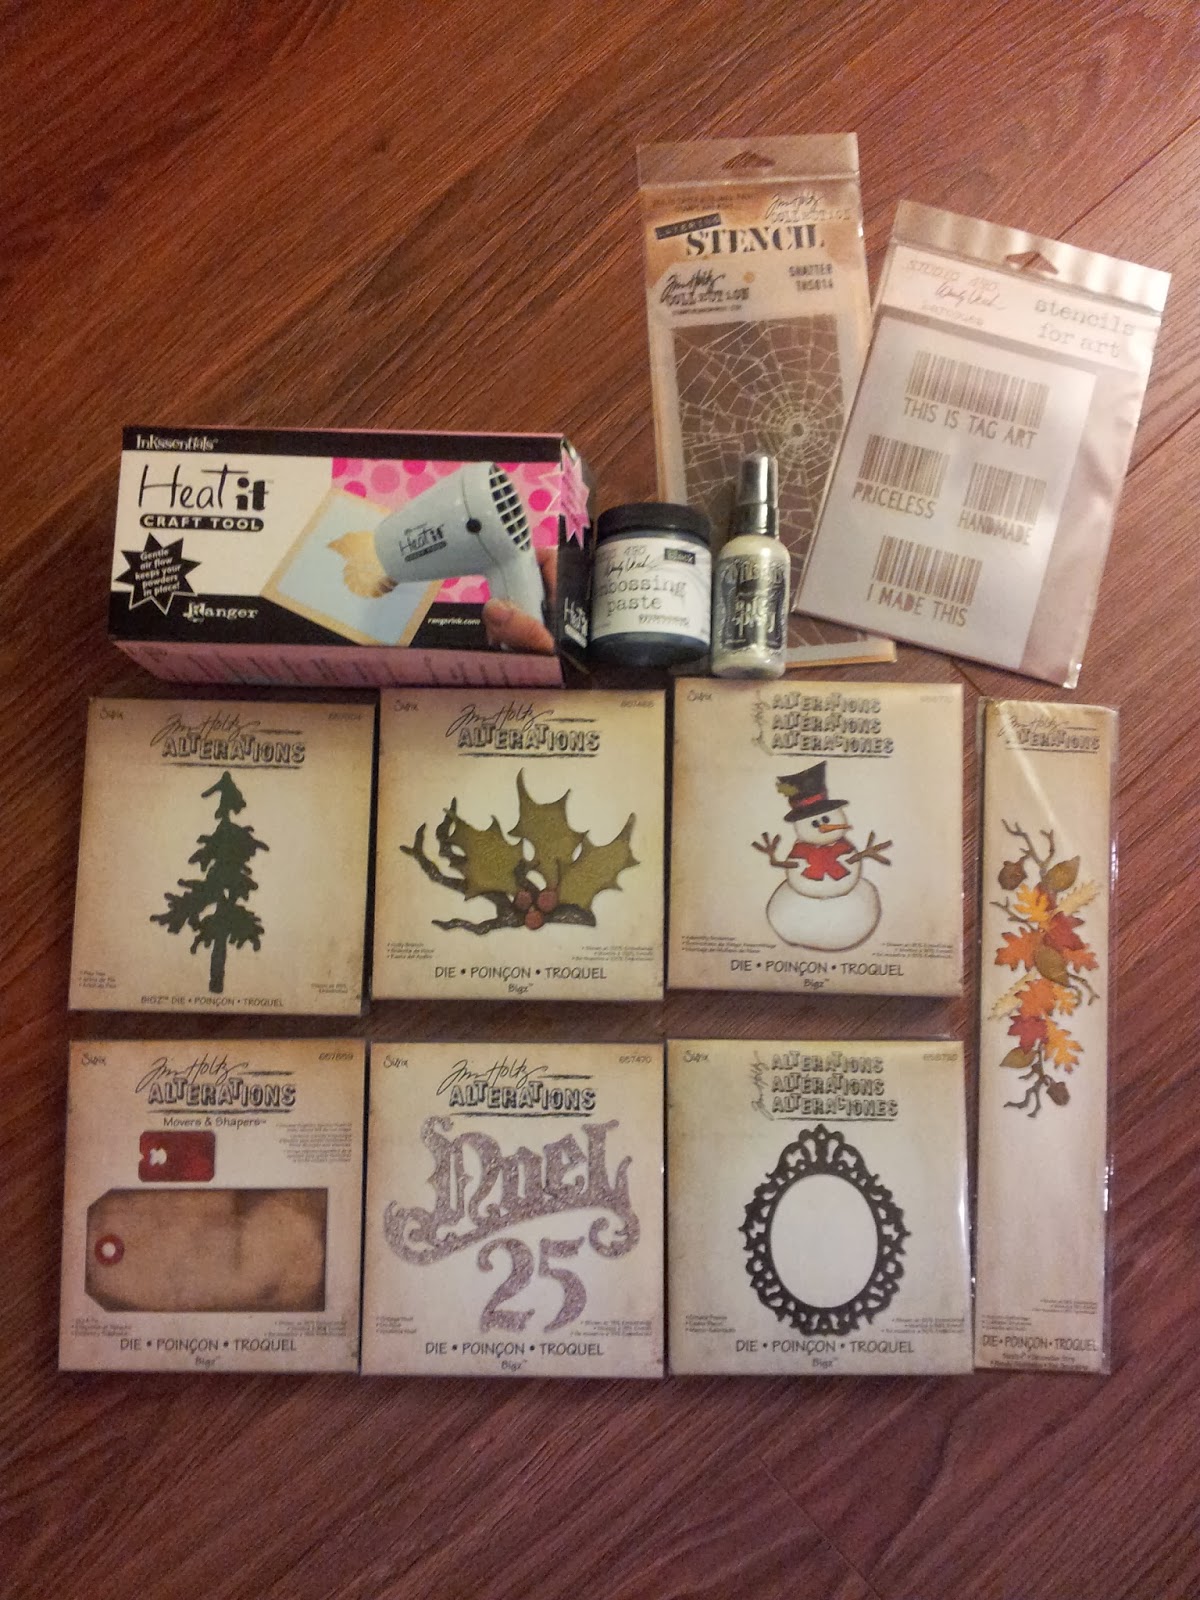
The last week or so I've been watching CHA 2014 videos and became fascinated with one of Wendy Vecchi reinker and alcohol techniques and so was itching to try it.  I ran out to the dollar store to grab my rubbing alcohol, and loaded up on all the colors of reinkers I could get my hands on, waiting for the store to get in the rest of the colors I don't have yet, and off to the races...

I love making tags so I pulled out my manila tags and got started.  :(  Note to self... the technique does not work on manila tags.  Wendy uses specialty stamping paper.  So, how does one improvise?  I decided to try using gesso on the tag first to seal it so that the ink wouldn't just absorb into the paper.  It worked like a charm!!!  Yehhhh... off to the races!  ;)  And I have to honestly say that the finish is amazing!  Even the feel of the paper with the gesso has this soft feel to it.  I spread the gesso on very thinly and evenly with a palette knife and then heat dried it.  Took seconds to dry.  :) 

I'll try to remember everything I did because I just started to play and it all came together in my tags.  It was afterwards when I thought to myself... I should have taken photos during the process and keep track of what I did but I'll try to share with you as best as I can.  :)  

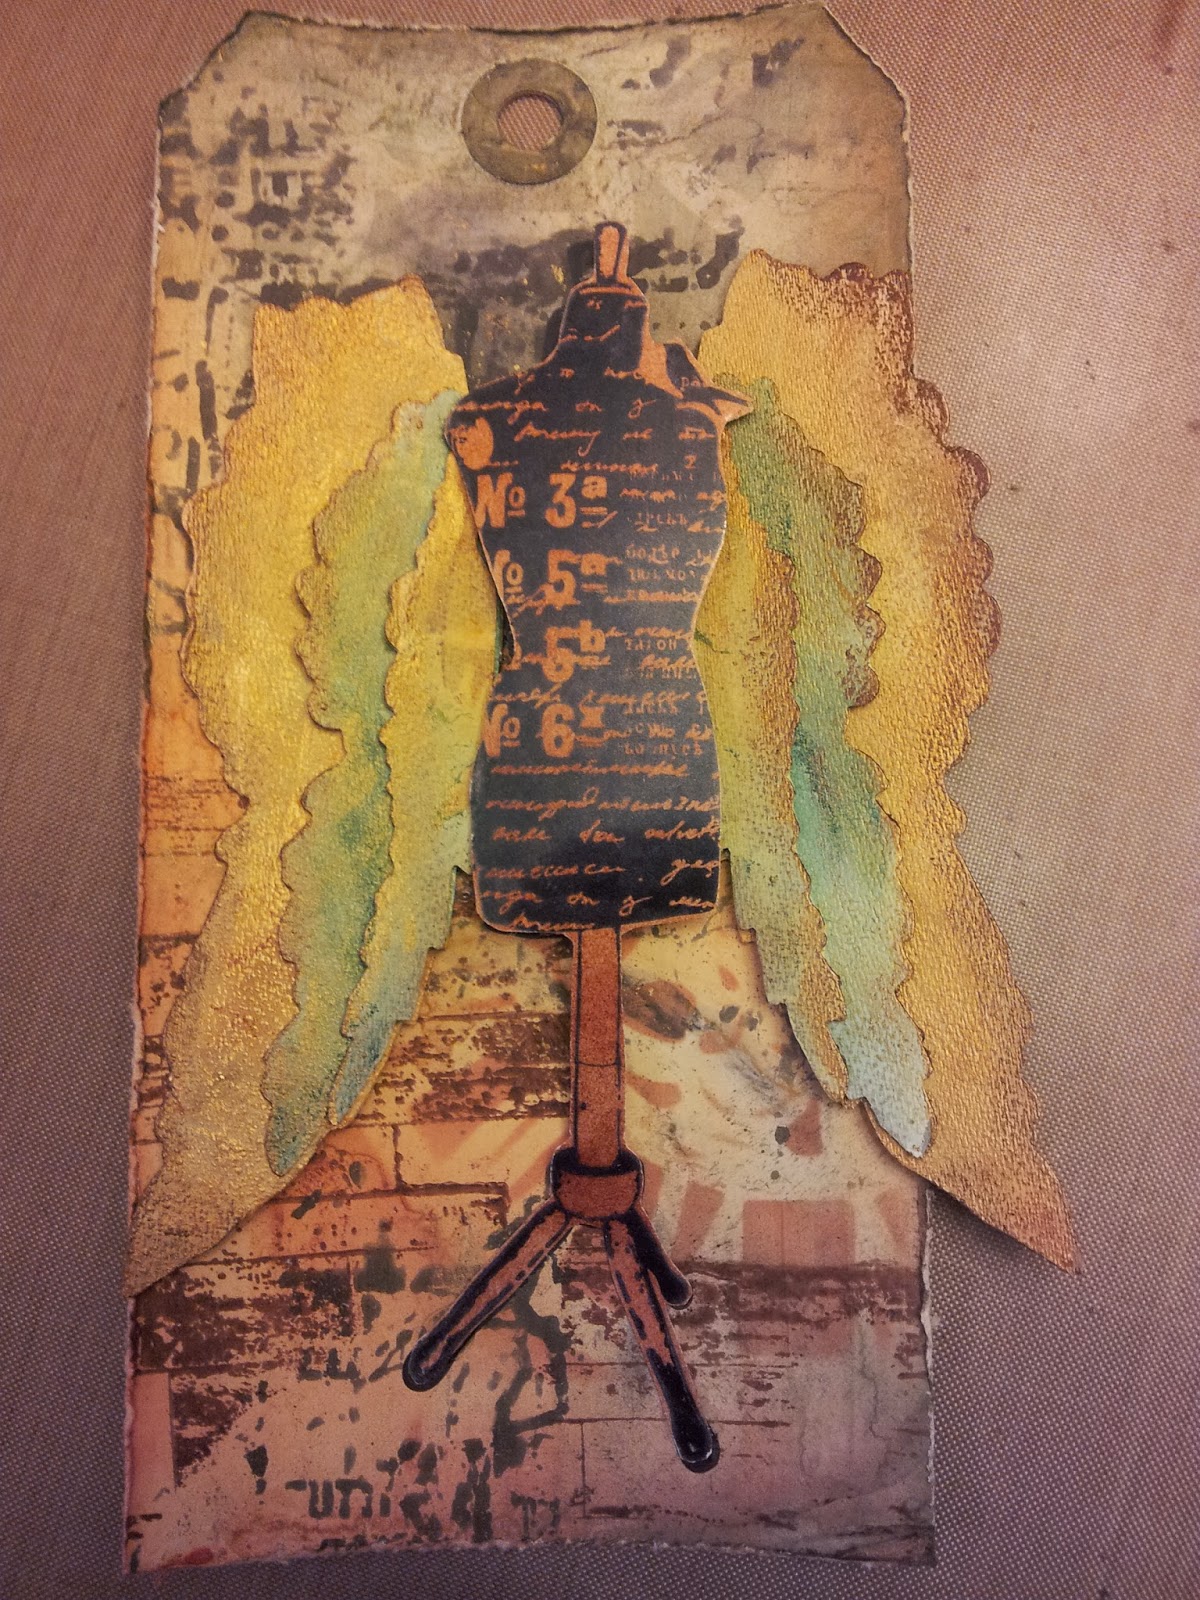
Here is my first tag:


I love this tag!  It's so full of stuff and quite cluttered looking but I like it!  LOL 

I used Archival reinkers fern green, cornflower blue and gold mixative.  Distress inks faded jeans.  Archival ink pads black, watering can, potting soil, orange blossom, fern green.  Embossing paste white.  Alteration sizzlits Spring Greenery.  Kaiser stamp flutter and butterflies.  TH stencils in bubble and rays, and a Crafters Workshop brick wall.  Prima flowers and dollar store butterflies. 

Once I had the tag prepped with gesso and dried, I did Wendy's marbling using cornflower blue and fern green reinkers,  gold mixative and rubbing alcohol.  Sweet!  I took some fern green ink and sponged it around parts of the outer edge of the tag and because I do not yet have the cornflower blue ink pad, I opted to use the Distress ink in faded jeans and did other parts of the tag and blending inwards in some areas as well to intensify the blue that I wanted more of. 

Next, I pulled my stencils and took white embossing paste with the brick stencil to make a stone wall and heat set it to dry.  Then I stenciled the bubble dots in watering can, the ray in orange blossom.  I went back to the bricks when I was sure it was completely dry and used my small finger thimble sponges from CTMH to color the wall using Archival inks in potting soil, orange blossom and watering can to create a stone wall look.  It turned out soooo good! 

I added the Kaiser flutter stamp and the butterfly in random areas. 

Next I die cut Spring Greenery from a soft green textured cardstock and used archival inks fern green and potting soil and color inked the leaves and stems.  I glued them into place.  Lastly, I added my prima flowers and my butterflies.  Whalla!  An amazing tag.  :)  I love the intensity and depth of the archival inks.  Super wow. 

Next up...
 
 
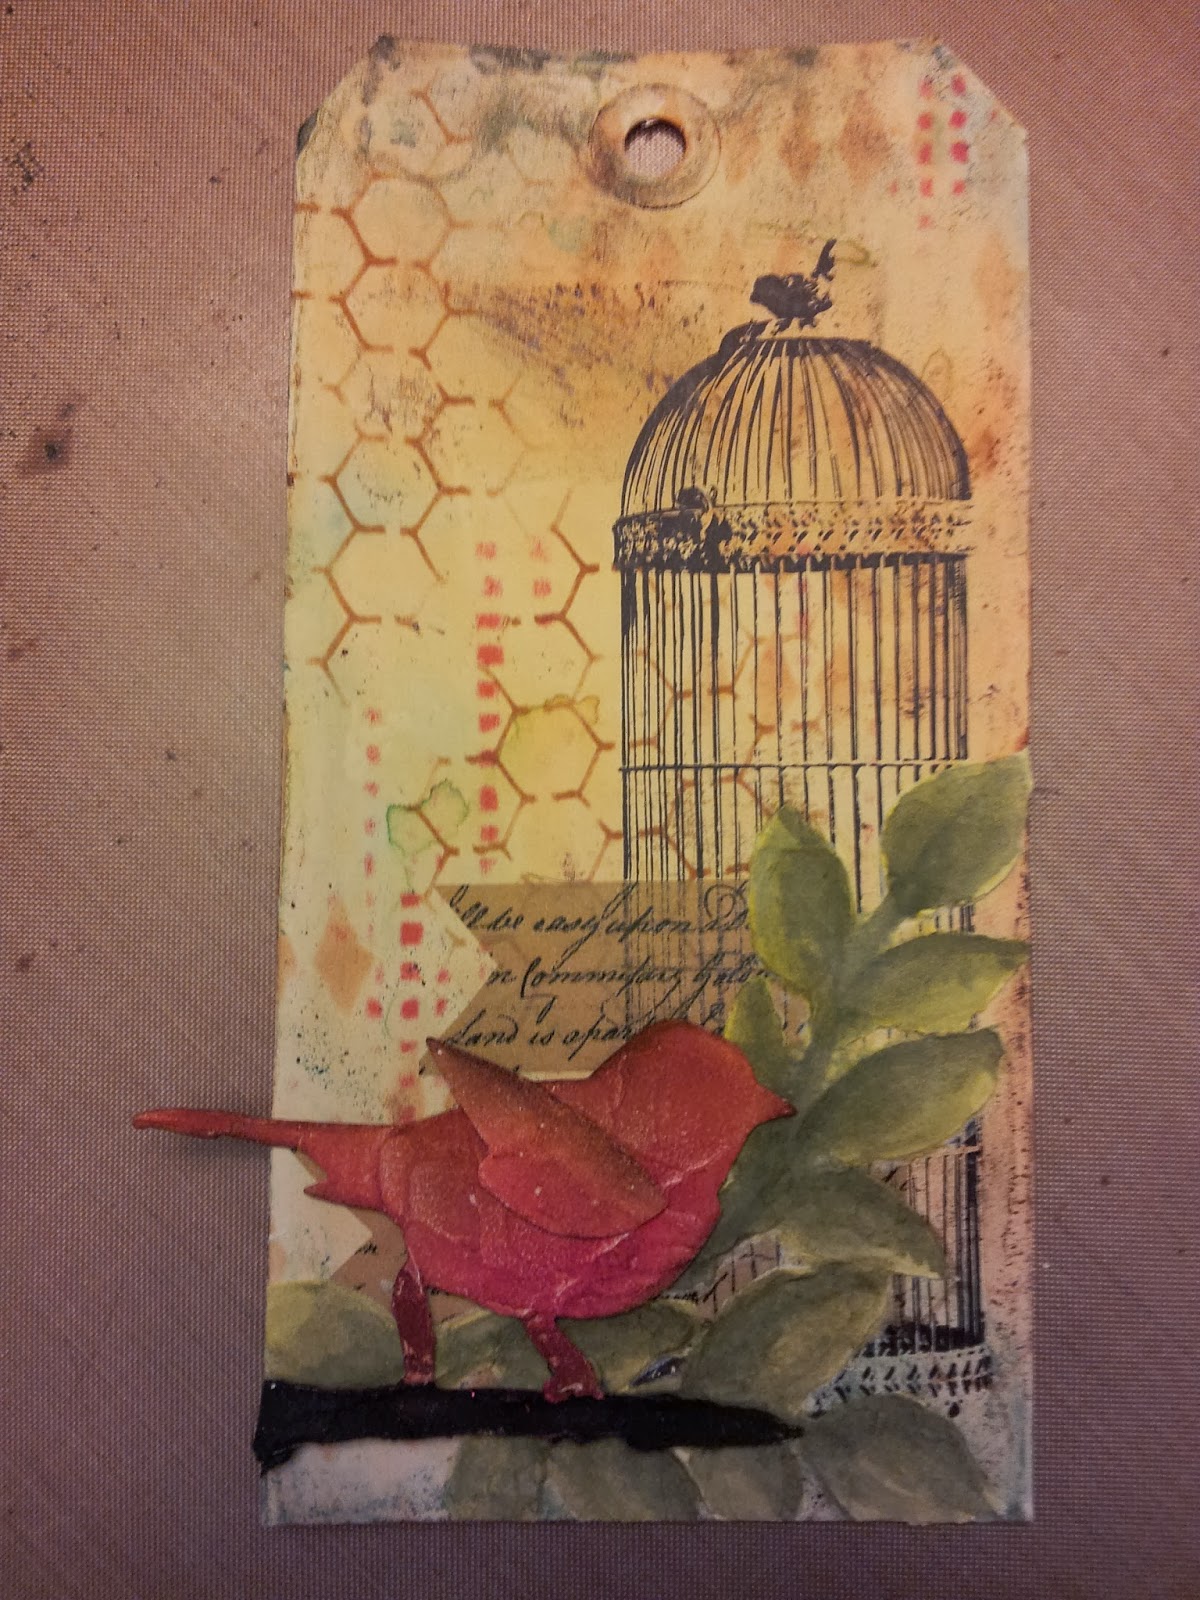
This is just a soft pretty tag. 

I used gesso, Archival reinkers in cornflower blue, coffee and gold mixative.  Archival inks in red geranium, potting soil, black, orange blossom, coffee. Kaiser stamp bird cage.  Heidi swap stencil.  TH bird cage die, embossing paste white and black.  Distress stains crushed olive and forest moss.  Washi tape.  Crafters Workshop stencil chicken wire, mini texture tile and dylusion diamond border.

I marbled the tag with the reinkers and dried it.  I random stenciled the chicken wire in potting soil ink.  The mini texture tile in red geranium.  The diamond border in orange blossom.  I put down some washi tape that I had cut tails into.  Then I stamped the bird cage over top.  Next, I took the bird stencil and stenciled the leaves with white embossing paste and set to dry.  While that was drying, I cut the bird from TH birdcage die.  I used black embossing paste and spread it across the branch for some dimension and did the same using white embossing paste and a  palette knife and covered the bird trying to shape texture into the bird to mimic the feathers.  I went back to the leaves and heat set it for a bit then used the two green distress inks listed and colored the leaves with a watercolor brush.  Heat set again.  Once the bird was dry, I used Archival inks red geranium, orange blossom and coffee and my thimble sponges from CTMH and colored the bird.  Heat set the color and glued him into place. 

Last but not least...
 
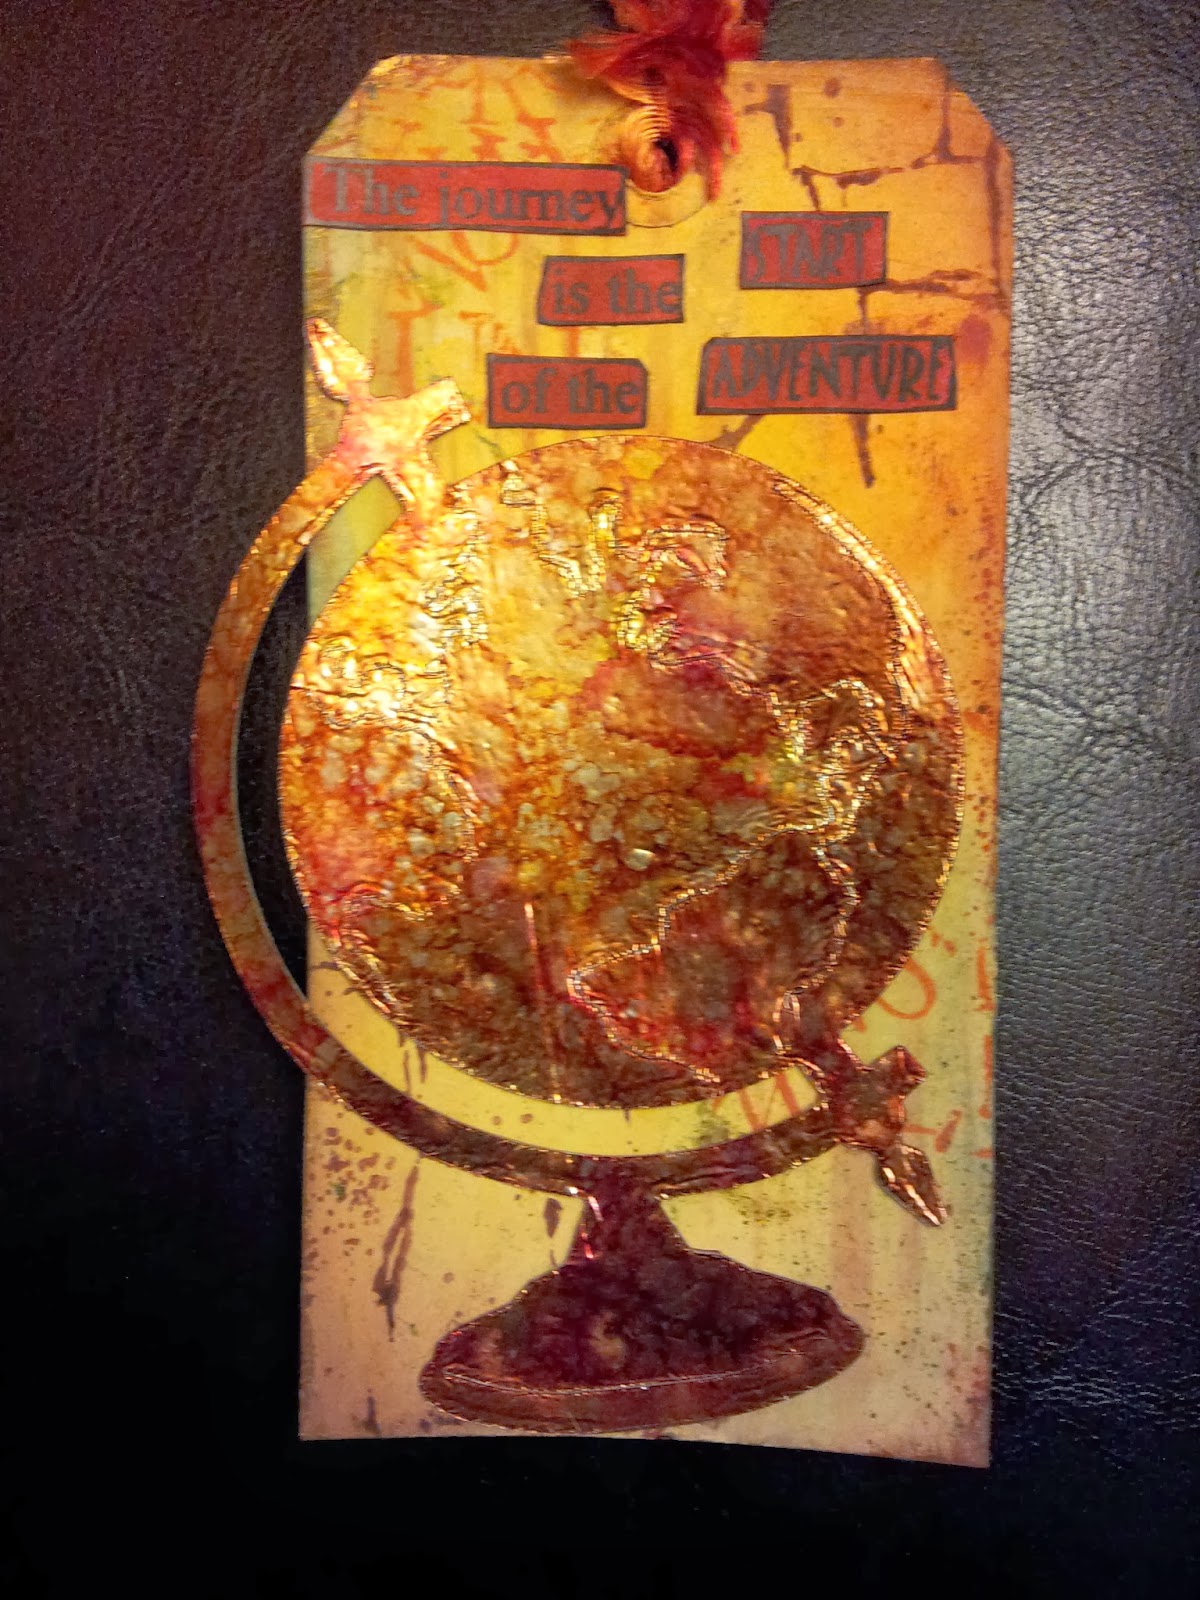
This one I'm going to have to completely wing it because I was working on it with my gf here visiting me and I gave it to her to take home so I'm going on memory alone since I don't have tag in front of me to refer to.  Shrug... Alright, lets try to recall...

I used gesso to seal the tag, Archival reinkers coffee and cornflower blue and gold mixative.  Archival inks in coffee, red geranium, black.  Distress ink vintage photo.  Alcohol inks, caramel, ginger, cranberry and some golden ochre color that came in the sets that doesn't have a color name on it.  Kaiser stamps rocks and alphabet. TH stencil stripes.  Alterations die vintage globe, grunge paper and foil tape sheet.  Dylusions Quintessential quotes.  (I love these, some of them crack me up)

I marbled the tag in coffee, cornflower blue and gold mixative.  I distress inked the edges in vintage photo.  I stamped the rock stamp in coffee, the alphabet in red geranium and stenciled the striped in vintage photo for a softer stripe look.  I took grunge paper and added the foil sheet overtop,  smoothed it with a brayer and then run it thru the die cut machine.  I used the alcohol inks with the gold mixative over top.  I inked the quote in black archival and cut out the words individually and then colored them with red geranium and potting soil lightly with a sponge tapping color on and blending.  I glued all my elements in place. 

Bedeep bedeep...That's all folks!  :)   I hope you enjoy my tags that I made.  I had so much fun making these.  Look forward to hearing what you think.  :)  See you soon.  :) 

Monday, January 13, 2014

On the Wall...

Hi!  I've been wanting to post this page for a couple of days already but keep running out of time.  So here I am finally able to sit down and do this before crashing for the night.  :)  I start back to work tomorrow after being off work for a year.  My intentions are to give myself the time I need to do my crafts and not let work get in the way of doing what I enjoy.  :)  That's my story and I'm sticking to it!  I'll get back to you on that one in a few months.  LOL 

This page is the second page to my Mirror mirror... on the wall... and these pages are about looking at myself in the mirror and seeing, recognizing things about myself that give me worthiness, things that I like/love about myself.  Giving myself permission to feel good about myself.  Let me tell you, it's a lot harder than it sounds.  ;) 

This page is a pretty but a simple layout.  I picked out my background paper again to correspond with the previous page.  I mixed two papers together and some washi tape. 


Next, I took the same Crafter's workshop stencil and the black embossing paste that I absolutely LOVE and stenciled the pattern onto the paper. 


I picked out my paper pocket with 10 strips from CTMH to write my 10 things I love about me on. I took some Distress ink in antique linen and vintage photo and inked the antique linen around the folder and the tag strips and then followed with the vintage photo just on the very edges to give it a bit more depth and definition.  I found a MME Jadore paper notes that I attached to the front of the pocket.  I also, made 3 flags in different lengths and added some Ideology words to them.  And I made some more rosettes for this page using the same technique that I showed in the previous page.  :)


I made a fan flower, not sure if that is the official term for them, but they were simply a strip of paper that I scored every 1/4" and then folded in an accordion fashion and glued the ends together and then pressed down towards to inside for it to fold inwards and create the flower.  I'd only made one of these before in a class project I took from my CTMH club night and it worked!!!  Yehhh..... 


This was a difficult page to do, and not because the page was hard but having to look at myself and come up with 10 things to write on the 10 pieces of paper.  I got to about 5 and had to stop and start thinking.  Hmmmmm....  it's a lot harder than it sounds.  LOL  :) 

I can't wait to do my next page layout.  :)  Since this week is my first week in taking the Brene' Brown classes I'm going to use my weekly classes as my inspiration for my layouts.  :) 

OHHHHHH... and before I go I have to share that I got my Xmas present to me delivered today!   Here it is!!!....


Clap clap clap clap clap clap............ That's me being super excited.  :)   If I had a bit more confidence in myself I'd video tape me doing the happy dance, but I really don't think that I should traumatize anyone!  LOL  So, I'll just leave that up to your imaginations.  ;)  


Friday, January 10, 2014

Mirror Mirror

Mirror mirror on the wall...Hi!  Another page done.  This journey thru this album is getting harder with each page as I go.  I guess that is the whole purpose of this exercise in inner growth and acceptance.  It's like someone asking you those tough questions that make you stop and think and have to really dig deep.  This theme will carry over onto the next page as well.  The whole idea of growing as a person inside is to love yourself first, but in order to do that one has to acknowledge and know what it is about themselves that they love.  So the next two pages are about Loving myself.  The second page will be a list of things about me that is worth loving.  Whoa.... getting real.  Scary.  :) 

Time to pick my paper that I want to use.  I cut off the top portion of the Love page and used the black paper and the washi tape for the top bit.  A good focus place for my title.  My tip for not wasting is I cut off the underneath part of the paper that would otherwise be covered up and use that in a project somewhere else down the road.  These papers are far to pretty to not use what you can for as much of it as you can.  :) 


In my stash of goodies that came in the mail yesterday was Wendy Vecchi black embossing paste!  OMG... I have a new favorite love!  It dries with this soft matte finish that looks like soft felt.  I had to touch it to see if it feels soft too.  It doesn't, but it is so nice!  In love...if you like to stencil with pastes, you got to try this stuff.  Amazing.  I'm happy with that purchase.  I used a stencil from Worker's Craftshop for the pattern.  Isn't it stunning!!!  I'm having a hard time taking my eyes off of it in front of me as I'm doing up my blog. 

 
Ok Ok... moving on... In my stash of goodies I finally got the Alterations big die Ornate Frame.  Sooooo...excited.  When this first came out and I saw it, I'll be honest I didn't think I'd want it.  I always improvised and made do with other stuff but the more I saw it being used in other people's projects the more I wanted it.  So, well...as a scrapbook hoarder, I had to have it.   So, I cut it out from chipboard, inked it black and with liquid glass I used Distress glitter in black overtop. I found glitter coming off of it when I moved it so I went back to my hairspray trick to seal it and it worked beautifully without changing the glitter effect or anything. The oval from inside I cut some foil sheets and adhered it to the oval and wrapped the overlap around to the back.  I put it inside the frame to give it that mirrored look. 


Up next, I wanted to add some flowers.  Red flowers actually, because Love is all about red.  Well, that and this whole album uses red.  :)  I saw a U-tube video yesterday that someone shared in my Circle and it showed how to take basic flower die cuts and turn them into bushy flowers.  So, I attempted it today.  They turned out great and I wish I had known this technique a long time ago.  I have so many basic paper flowers that are just so.... what's the term... blahhhhh.... Now I actually will be able to make nice flowers from them.  :)  Sweet!!!  Let me show how easy it was...


 Whalla!!!  A pretty rosette.  :)  So simple and only took minutes to make them.  :)   I also found some remnant red lace ribbon and I made a flower with it as well by folding it fan like around in a circle and tacking it together with the Tim's tiny attacher.  Super fast and easy. 


 I used some of my scrap pieces of paper from the previous pages and cut a few flags.  I pulled out my Ideology sayings and found some words that I felt described what I wanted it to say.   I dug thru my hoards of stuff and found some chipboard letters from K&Company as well as some other shiny letters and embellishments that I found over the years at dollar stores.  I finally found a use for them.  :) 


And that is the first page of this two page layout.  :)  You'll have to wait for the second page.  Not because I don't want to post it yet, but because I'm not done yet!  :P  I have my paper picked out and some of the things I want to use on it, so perhaps tomorrow I'll get it done and posted. 

I start back to work next week and that will place a real wrench into my time I get to spend on scrapbooking but I plan on making that a part of my time for me and do some playing in the evenings while I'm home alone.  :)   Thanks for visiting.  I love it when I hear from you so please let me know you were here before you leave.  :)  See you soon!  :)


Thursday, January 9, 2014

AA for scrapbookers

Hi my name is Diane and I am a scrapoholic hoarder.  It started when I innocently bought some stuff to do an album just for fun.  Shortly after, I connected with a friend whom I had lost touch with over the years and she was a serious scrapbook girl. I mean serious!!!  I've never seen a scrapbook room as cluttered and full of eye candy as hers!  She became my enabler and I became a junkie!  Truly it is like being addicted to drugs!  LOL  Not that I know what it is like to be addicted to drugs, but I know what addiction is because once again... my name is Diane and I'm a scrapoholic hoarder! 

There are tons of video's out there and my favorite is Lynda and OMG could I connect with her!!!  She's my sister from another Mister.  LOL  I howled when I saw her video, she was just too funny!  And almost everything she was talking about and showing I was nodding my head saying... Yup I got that, got that...yup got that too...  LOL  It was like watching my alter ego in a mirror. 

So, because I didn't get anything creative done today, I wanted to give you a tour of my room so you could see just how bad us crafters can be... but I'm sure like me, many of you will look at this and say to yourselves... Ahhhhhh, that's all she's got... heck I got more than that!  LOL  And if you do, you should join my AA for scrapbookers club too!  And you are probably wondering why AA, we're not alcoholics?   It stands for Artisticly Anonymous for Scrapbookers!   And as in all AA groups the first step is admitting that we have a hoarding problem.  LOL  Yes, I can admit it!  I may not do anything about changing it but I can do the first step.  LOL

So lets give you a photo shoot of my space.  But first, let me show you what I've done to my poor dining room table.  ;(  LOL


I couldn't keep it in my room oh nooooo....let's spread out across the whole house!  lol  Ok, onto my room now...

Entering thru the door I'll take you from straight ahead right corner of room and work around the walls back to the door... hope that makes sense, we're going counter clockwise around the room. 


 I think I'm only about 3 or 4 colors shy of all the glitters!  And guess what I got in the mail today!!!  Oh yes.... My man... Tim Holtz!  Well, Ok I didn't get Tim Holtz literally!  If I had, my blog would cease to exist cause I would have died of a heart attack on the spot.  I would have been like a 9 yr old school girl seeing Justin Beaver for the first time!  LOL Insert Howie Mandell... Whaaaat???  He's Canadian and the beaver is one of our Canadian symbolic animals, is it not?  LOL  Anyhow, lookie at what I got in the mail today!!!  And I have one more coming because it got held back at the border I think.  My order was missing 4 Alterations dies but they are only a few days away!!!  :)  I also am still waiting for my Vagabond!!!  Yes, yes I am... thank you, thank you very much.  Courtesy of my husband who didn't buy me anything for Xmas, it was my Merry Christmas to myself on his credit card!  LOL  ;)   As was all this stuff!  ;)  He got a Harley, I get scrapbooking stuff!  I still think I got ripped off. 


Ohhhhhhh.... the excitement of new stuff to play with.  Yes, Yes I know... I saw my room!  I have a mini side kick, a cuttlebug, a texture boutique, a big kick, a cricut personal, a cricut expression, a gypsy and awaiting the arrival of the envy of them all, the Vagabond.  Whahahaha.... insert evil laugh here... but I just can't get enough of Tim!  Wait till Cha 2014 gets out there... oh boy....rubbing hands together feverishly!  ;) 

So, I'm sure many of you can relate and if you can't, give it time and you will!  LOL  Just kidding, sort of.  ;)